As the demand for healthier, preservative-free baking and brewing continues to rise, more people are turning to homemade yeast cultivation. In 2024, a noticeable trend emerged among home bakers and fermenters seeking deeper flavor, longer shelf-life, and sustainable alternatives to commercial yeast. By creating your own yeast from simple ingredients like fruits, flour, or honey, you not only control the fermentation process but also enhance the nutritional and flavor profile of your bread or beer. In this guide, we’ll uncover everything from the science behind yeast to expert tips for keeping your wild yeast culture alive and thriving. With fermented foods gaining popularity for gut health and authenticity, mastering yeast at home could change how you cook and consume—forever.

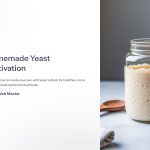
What is Homemade Yeast and Why It Matters
Homemade yeast, often called “wild yeast” or “natural leaven,” is a living culture made from the natural microorganisms in flour, fruits, or the surrounding air. Unlike store-bought instant yeast, this kind grows slowly but brings rich, complex flavors to bread, beer, or other fermented goods. It’s not just a trendy baking fad—cultivating your own yeast can be a transformative practice. It reflects a return to artisanal food-making, where patience and precision meet tradition.
The fermentation process breaks down gluten and boosts nutritional value, making bread more digestible and flavorful. Beyond the kitchen, learning this method deepens your understanding of biology and chemistry, giving you full control over what you eat. Plus, in times of shortages or dietary restrictions, homemade yeast becomes a practical, sustainable solution.

Ingredients You Need to Start Cultivating
To start your own yeast culture, you’ll only need a few simple, natural ingredients. Most popular options include:
- Flour (preferably whole wheat or rye)
- Water (non-chlorinated)
- Fresh fruits (grapes, raisins, apples) or honey for sugar sources
- A clean jar or glass container
Choose organic and unwashed ingredients when using fruit, as the wild yeasts live on their skins. The container should be glass or food-safe plastic, and avoid metal lids since they can interfere with fermentation. Water is crucial—chlorinated tap water can inhibit yeast activity, so filtered or dechlorinated water is best. When combining ingredients, always maintain a clean environment to prevent contamination.

Step-by-Step: How to Make Homemade Yeast
Here’s a basic method to cultivate your own yeast:
- Day 1: Mix 1/2 cup of flour and 1/4 cup of warm water in a jar. Stir well, cover loosely with a lid or cloth.
- Day 2–3: Add the same amount of flour and water each day. You should start to see bubbles.
- Day 4–5: Your mixture will begin to smell sour and have more activity. Discard half and feed again.
- Day 6–7: When it doubles in size within 4–6 hours of feeding, it’s ready.
Patience is key—every environment behaves differently. The optimal temperature is around 21–24°C (70–75°F). If your yeast isn’t active after a week, don’t worry. Restart or adjust ingredients. Keep your jar clean, avoid contamination, and feed it consistently. Use a rubber band to track growth after feeding—it helps you monitor rise and fall, showing health and strength.

Troubleshooting Common Problems
Sometimes, your yeast might not act as expected. No bubbles? Sour smell too strong? Here are some common issues and solutions:
- No activity: Water might be chlorinated or environment too cold. Try filtered water and place in warmer area.
- Bad smell: If it smells rotten or like nail polish, discard and restart. That’s a sign of contamination.
- Mold: If visible mold appears, discard everything. Clean tools and try again.
Feeding schedule inconsistency is a top cause of failure. Set a reminder to feed your culture daily. Use a clean spoon each time, and keep your container covered but breathable. Don’t seal it airtight—yeast needs airflow to thrive. If it develops a gray liquid (hooch), it’s hungry—just stir it back in and feed. Don’t panic at setbacks; most issues are fixable with minor adjustments.

Using Homemade Yeast in Recipes
Once your yeast culture is active, you can use it to bake bread, brew drinks, or ferment other foods. For baking, replace commercial yeast with your starter by weight (often about 100g of starter per loaf, adjusting water/flour ratios accordingly). Let your dough rise slowly—wild yeast works slower but develops deeper flavors.
In brewing, yeast made from fruits can ferment natural sodas or meads. Always test small batches first. Each strain of yeast behaves differently, so some experimentation is part of the process. Track your results with a simple logbook, noting temperature, ingredients, and timing to refine your technique.

Storing and Maintaining Your Yeast Culture
Your yeast is alive and needs regular feeding to survive. If you bake often, you can leave it at room temperature and feed it daily. If not, refrigerate it and feed once a week. To feed, discard half the culture and add fresh flour and water.
When stored properly, yeast can live indefinitely. Label your jar with dates and feeding notes. You can also dry your starter for long-term storage by spreading it on parchment and letting it air-dry. Crumble and store in an airtight container. Reactivate by rehydrating and feeding it for a few days. This method is great for travel or emergency use.
Yeast maintenance is as important as cultivation. Think of it like a pet—it thrives with care, rewards you with better flavor, and can even be shared or gifted.

*Capturing unauthorized images is prohibited*